Category: Tutorial

  • How to Migrate from B2BKing to B2B Suite (Free, Step by Step)

    How to Migrate from B2BKing to B2B Suite (Free, Step by Step)

    B2BKing is one of the most complete B2B plugins for WooCommerce — groups, rules, companies, credit, quotes. That completeness is exactly why switching feels risky: there’s a lot of data, and nobody wants to rebuild a season’s worth of pricing and accounts by hand.

    Good news: you don’t have to. B2B Suite has an importer built specifically to bring a B2BKing store across — groups, buyers, every kind of price rule, quantity rules, tax exemptions, catalogue visibility, companies, credit balances and offers — and it does it as a dry run first, never writing to B2BKing’s own data, and safe to run twice.

    This guide walks the whole move, step by step, using the importer in the free B2B Suite plugin. You can migrate and check your pricing before spending anything.

    TL;DR

    • The importer is in the free plugin: B2B Suite → Settings → Import. Pick B2BKing as the source.
    • It reads B2BKing straight from WordPress storage — its group/rule/offer post types, user meta and post meta — so B2BKing doesn’t need to be active and nothing is ever written back to it.
    • Groups, buyers, approval, all three rule types (percentage / fixed amount / fixed price), per-group product prices and quantity tiers, min/max/multiple quantity rules, tax exemptions, catalogue visibility, payment gating, companies & sub-accounts, credit limits & balances, and active offers all come across automatically.
    • Per-user product prices, shipping-method gating, max-spend caps, custom registration fields and RFQ chat history need a manual step — each is called out by name in the report.
    • Every import is a dry run first; nothing is written until you confirm. Running it again updates instead of duplicating.
    • The free plugin includes one customer group. B2BKing stores usually have several, so run the import with Pro active to bring every group across — and Pro-domain data (companies, credit, quotes, tax) imports now and switches on when you upgrade.

    What the importer actually does

    B2BKing keeps its groups and rules as custom post types, a user’s group on user meta, and its per-product prices on product meta. The importer reads all of it directly from those WordPress tables — which is what makes the move safe:

    It reads, it doesn’t rewrite. The importer only writes into B2B Suite’s own groups, rules and tables. B2BKing’s data is never touched.

    B2BKing doesn’t need to be active. Because everything lives in WordPress storage, the import works whether the B2BKing plugin is switched on or off.

    Every run is a preview by default. You see the groups, customers, rules, companies, credit accounts and quotes it would create, plus a warning for every record it can’t map cleanly. Nothing is written until you confirm.

    Running it twice is safe. The importer records a map of “this B2BKing record became this B2B Suite record,” so a second run updates those records instead of duplicating them — import early, keep selling on B2BKing, re-import at switchover.

    What comes across automatically

    B2BKing is the incumbent B2B Suite maps most completely. In one pass:

    • Customer groups → customer groups. Each B2BKing group becomes a B2B Suite customer group.
    • Buyers, their group and approval state. Every user is placed into the right group, approved or pending as they were.
    • Price rules — all three types. Percentage off, fixed amount off and fixed price, across B2BKing’s who (group / everyone) and what (all products / product / category) dimensions.
    • Per-group product prices & quantity tiers. The prices B2BKing stores on the product itself — including tiered “buy more, pay less” breaks — come across as product rules.
    • Quantity rules. Minimum, maximum and multiple (pack-size) rules, including product-level min/max/step.
    • Group tax exemption → tax-exempt groups.
    • Catalogue visibility. Hide-prices-from-guests, a fully private “B2B mode” catalogue, and per-group hidden categories.
    • Payment method gating → method gating. Which payment methods a group is allowed.
    • Companies & sub-accounts. A parent account becomes the company admin; its sub-accounts become company buyers.
    • Company credit. Credit limits and consumed balances become a credit account with an opening ledger entry.
    • Active offers → quotes. A live B2BKing offer to a customer imports as a quote they can still accept.

    What needs a manual step (and why)

    A short list can’t be mapped automatically — usually because the two plugins model something differently and a blind copy would be wrong. The importer flags each one in the dry-run report:

    • Per-user product prices. B2BKing can price a single product for a single user; B2B Suite’s customer pricing is store-wide (a customer sees their price on everything). Rather than guess, single-user product prices are flagged.
    • Shipping-method gating. B2B Suite gates shipping too, but WooCommerce shipping method ids differ between installs, so the importer asks you to set the shipping allow-lists by hand rather than map ids it can’t be sure of.
    • Maximum order value caps. B2B Suite caps order quantity, not spend, so a max-spend limit is flagged.
    • Standalone credit users. A user with a credit limit but no company has nowhere to attach in B2B Suite’s per-company credit model — flagged so you can create the company first.
    • Custom registration fields. Recreate any extra fields you added to the B2BKing sign-up form.
    • RFQ conversation history. The active offer imports as a quote; the back-and-forth chat behind it doesn’t (low value once the offer itself is across).

    Everything here is surfaced as a named warning with a note on how to finish it — that list is your manual to-do list.

    Where each B2BKing thing lands

    If you think in B2BKing terms, here’s the quick translation. Items marked Pro are Pro features — but the importer still writes them on the free plugin now, and they switch on when you upgrade.

    In B2BKing In B2B Suite How
    Customer groups Customer groups Automatic
    Rules (%, fixed amount, fixed price) Price rules Automatic
    Per-group product prices & tiers Price rules Automatic
    Min / max / multiple quantity rules Quantity rules Automatic
    Group tax exemption Tax-exempt groups Automatic · Pro
    Hidden prices / B2B-mode / hidden categories Catalogue visibility Automatic · Pro
    Payment method restrictions Method gating Automatic · Pro
    Companies & sub-accounts Company accounts & users Automatic · Pro
    Credit limits & balances Net terms & credit Automatic · Pro
    Offers Quotes Automatic · Pro
    Per-user product prices Customer pricing Manual
    Shipping-method restrictions Method gating (shipping) Manual

    One heads-up: full B2B mode

    If your B2BKing store runs in full B2B mode — the whole catalogue hidden from anyone who isn’t a logged-in, approved trade customer — the importer will faithfully carry that across and make your B2B Suite catalogue private too.

    That’s correct, but it’s dramatic, so the dry run calls it out as a heads-up notice (separate from the “couldn’t migrate” warnings) before you commit. If you’d rather open the catalogue up after switching, you can change it under Settings → Access & visibility once the import is done.

    Migrate step by step

    Seven steps, and steps 4–6 are the whole of it.

    Step 1: Install B2B Suite (free)

    Add B2B Suite for WooCommerce from WordPress.org alongside your existing setup. It won’t fight B2BKing yet — you’re only reading data.

    Step 2: Activate Pro (most B2BKing stores will want it)

    The free plugin ships with a single customer group, and much of what makes B2BKing worth migrating — companies, credit, quotes, tax exemptions, catalogue visibility — is Pro-domain. Run the import with Pro active so all of it comes across in one pass. The dry run tells you what it found either way, so you can decide before paying.

    Step 3: Open Settings → Import and choose B2BKing

    Go to B2B Suite → Settings → Import. The importer detects B2BKing’s stored data automatically. Choose it as the source.
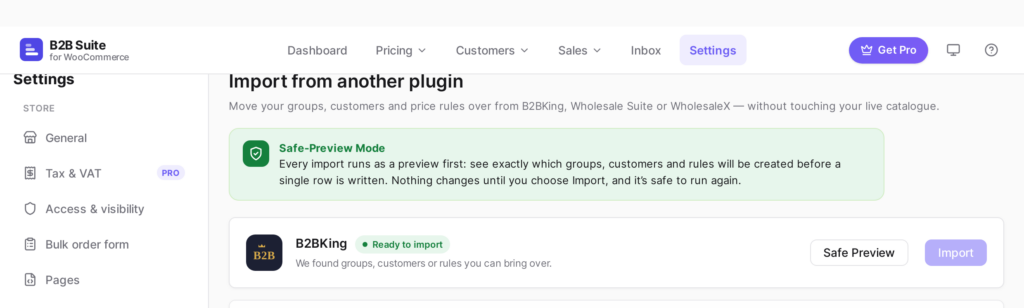
    Settings → Import: B2B Suite detects B2BKing and marks it “Ready to import.”

    Step 4: Run the dry run

    This writes nothing. You get a full report: the groups, customers, rules, companies, credit accounts and quotes it will create, plus a warning for every record it can’t map cleanly.

    Step 5: Read the report — the heads-up and the warnings

    Skim the counts to confirm they match your store. Then read the heads-up notices (like a private catalogue) and the couldn’t-migrate list — that’s your short manual to-do list.
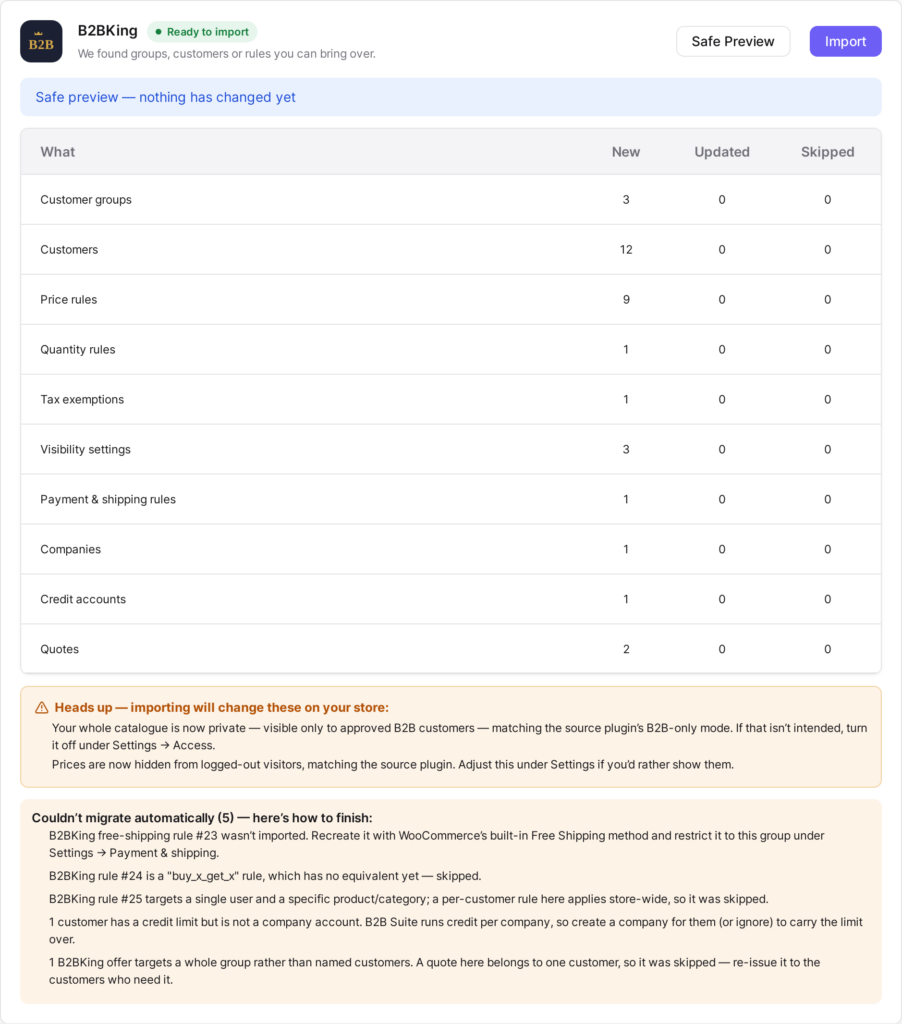
    The dry run reports exactly what it will create — and names anything it can’t map.

    Step 6: Commit

    Happy with the preview? Confirm, and the same import runs for real. Because it records a source-to-created map, you can safely re-run it later to pick up anything that changed on B2BKing in the meantime.

    Step 7: Switch the storefront over

    Once your prices check out (next section), deactivate B2BKing so only one plugin is resolving prices. Keep it installed-but-off for a while — that’s still your instant rollback.

    Check your prices before you switch

    Three checks, about five minutes, and you’ll know the migration is right before a real buyer does.

    1. Check a price. In Pricing → Check a price, enter a product whose trade price you already know and a customer from an imported group. The tool shows the full precedence trail — which rule won and why — so you can watch the imported rule do its job.
    2. View as customer. Use view-as-customer on a real imported buyer and walk the shop, cart and checkout. Confirm all three agree on the number. (B2B Suite resolves prices through one pipeline covering both the classic checkout and Cart & Checkout Blocks, so a correct price is correct everywhere.)
    3. Clear the warnings. Work down the dry-run warning list and recreate the handful of items that needed a manual step.

    Rolling back

    Because nothing was ever written back to B2BKing, rollback is simple: deactivate B2B Suite, reactivate B2BKing. Your old store is exactly as you left it — which is why it’s safe to run the import, even the real committed one, on a live store.

    FAQ

    Does B2BKing have to stay active during the import?

    No. The importer reads B2BKing’s data from WordPress storage directly, so it works whether the plugin is active or not. Most people leave it on until they’ve verified prices, then switch it off.

    Will importing change or delete anything in B2BKing?

    Never. The importer is read-only towards B2BKing — it only writes into B2B Suite’s own tables. That’s exactly why deactivating B2B Suite restores your previous setup.

    Does it really bring across companies and credit?

    Yes. Company accounts and their sub-users come across, and each company’s credit limit and current balance become a B2B Suite credit account with an opening ledger entry. (A user with credit but no company is flagged, since B2B Suite’s credit is per-company.) These are Pro features, so run the import with Pro active to bring them over.

    Do I need Pro to migrate?

    You can migrate and verify basic pricing on the free plugin. But B2BKing stores usually have several groups and lean on Pro-domain features (companies, credit, quotes, tax, visibility), so most will want Pro active during the import. Even then, everything imports on the free plugin and simply activates when you upgrade.

    My whole B2BKing catalogue is hidden from the public. What happens?

    The importer carries that across and makes your B2B Suite catalogue private too, and it warns you before committing. You can reopen the catalogue afterwards under Settings → Access & visibility.

    Can I import, keep selling, and re-import later?

    Yes — that’s the recommended way to switch a busy store. The importer maps each source record to what it created, so a second run updates instead of duplicating. Import early, keep taking orders on B2BKing, then re-import right before you flip the storefront over.

    Conclusion

    B2BKing holds a lot — groups, rules, product prices, companies, credit, offers — and the reason migrations feel scary is the fear of leaving some of it behind. The B2B Suite importer is built precisely so you don’t: it reads all of it, shows you exactly what will land in a preview you approve, names the few things it can’t map, and never touches B2BKing so the door back stays open.

    Get B2B Suite free on WordPress.org and run the dry run on your own store today. Need help? The docs cover every setting, and support is here if you get stuck.
  • How to Fix Broken Images in WordPress (and Never Show One Again)

    How to Fix Broken Images in WordPress (and Never Show One Again)

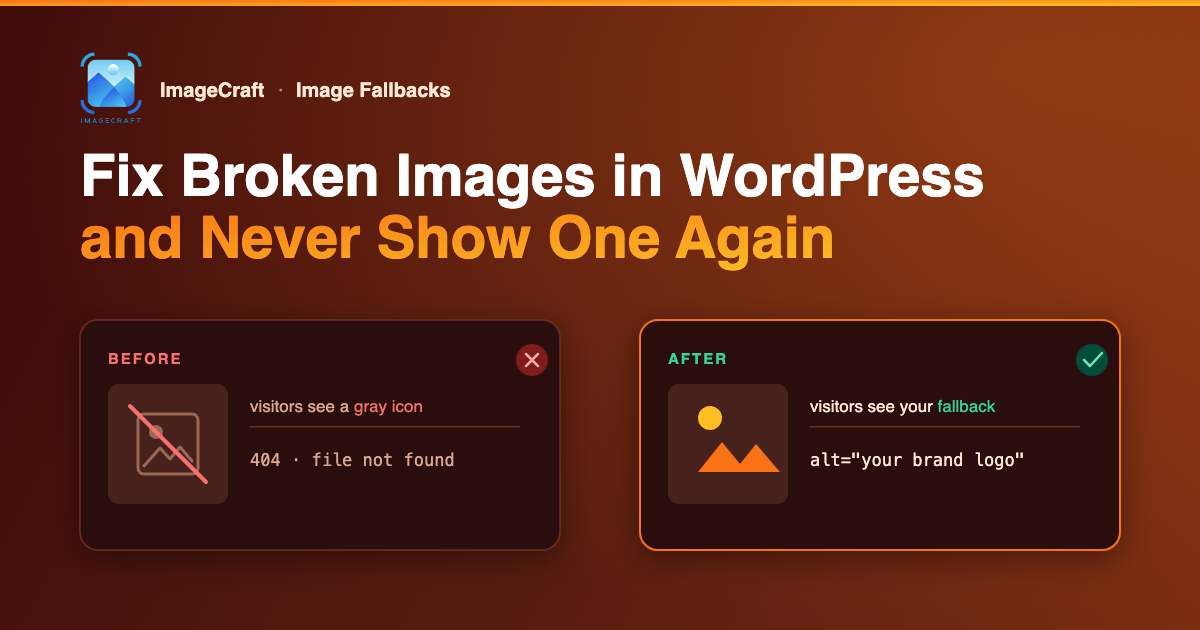
    You know the icon. A small gray square with a torn photo inside it. It shows up on a page where an image used to be, and it tells every visitor the same thing: nobody is looking after this site.

    Here is the uncomfortable part. Your visitors see broken images before you do. You look at your own site a few times a week, and mostly the same pages. Your visitors land everywhere — old posts, deep archive pages, product pages you haven’t opened in a year. If an image broke on one of those pages last month, it has been greeting people with that gray icon ever since.

    And images break more often than you would think. You clean up your Media Library and delete a file that was still used somewhere. You migrate to a new host and a few files don’t make the trip. You hotlinked an image from another site years ago and that site is now gone. None of these feel like big mistakes at the time. Each one leaves a broken image behind.

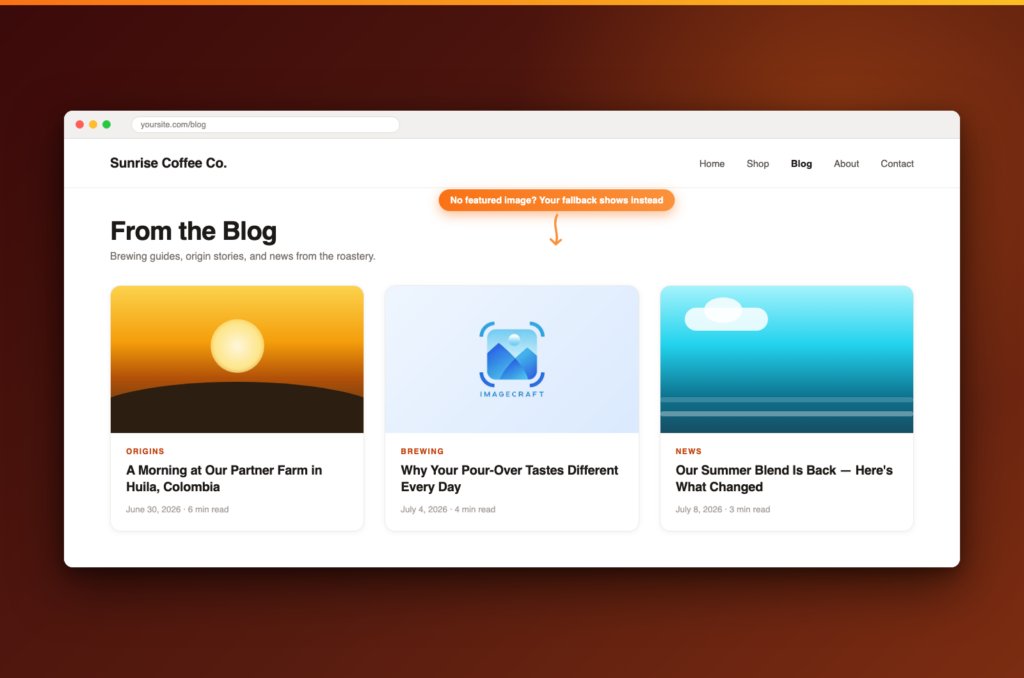
    There is a second, quieter version of the same problem: posts with no featured image at all. They don’t show a broken icon, but they show up as a blank card in your blog archive, an empty box in “related posts,” and a bare link when someone shares them on social media. One post with no thumbnail in a grid of posts with thumbnails looks exactly like what it is — the one nobody finished.

    ImageCraft’s Image Fallbacks feature handles both. You pick one fallback image, turn the feature on, and from that moment no visitor ever sees a broken icon or an empty thumbnail on your site again. It also scans your Media Library and shows you which images are actually broken, so you can fix the real problem, not just cover it.

    TL;DR

    • Image Fallbacks does two things: it swaps broken images for a fallback image the moment they fail, and it gives posts without a featured image a default one.
    • It is fully non-destructive. Nothing is written to your posts or your database. Turn it off and your site goes back to exactly how it was.
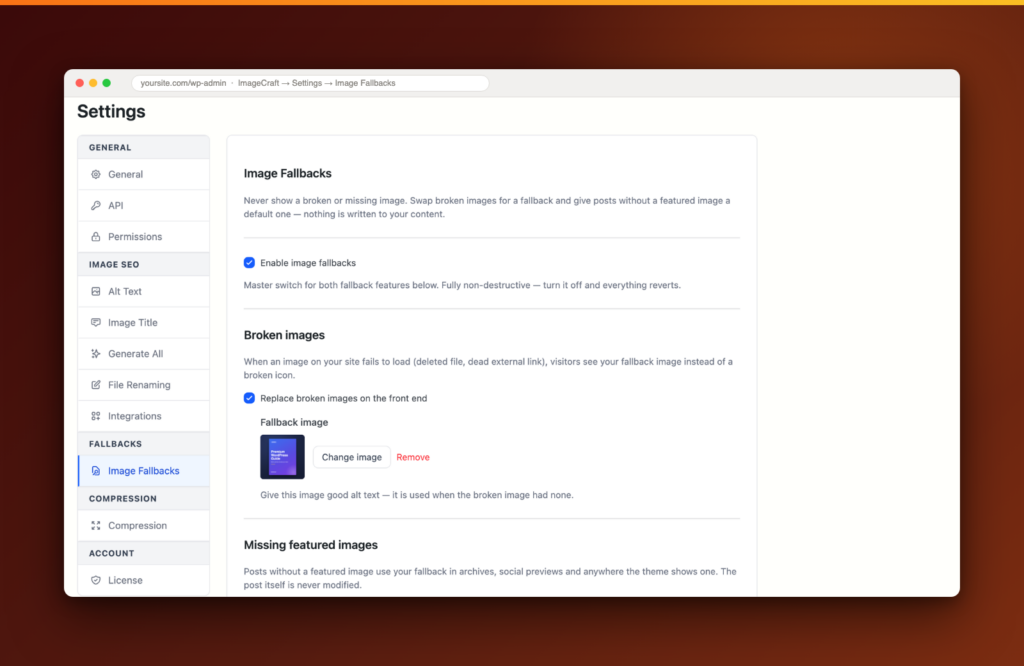
    • Setup: go to ImageCraft → Settings → Image Fallbacks, turn on Enable image fallbacks, pick a fallback image, and turn on the parts you want.
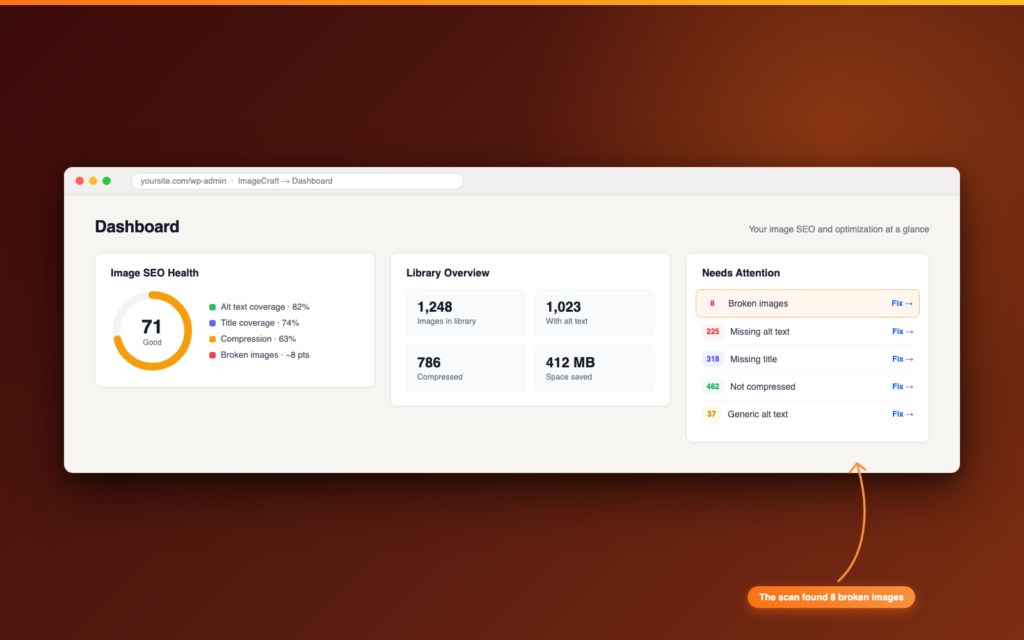
    • The Dashboard scans your Media Library for images whose files are missing and lists them under “Needs attention,” so you can repair the real problem too.
    • The fallback carries proper alt text, so it stays friendly to screen readers and search engines.
    • Free covers one global fallback image and the manual scan. Pro adds a different fallback per post type (say, a product placeholder for WooCommerce) and a scheduled scan that emails you when new broken images appear.
    • It is off by default. If you updated the plugin and changed nothing, nothing changed.

    Why images break in the first place

    It helps to know what you are actually protecting against. Almost every broken image on a WordPress site comes from one of these:

    You deleted the file. This is the big one. You open the Media Library, see an image, think “I don’t use this anymore,” and delete it. But WordPress does not warn you if that image is still sitting inside an old post. The post keeps the image URL, the file is gone, and the page now shows a broken icon.

    You migrated or changed hosts. Moving a site is messy. Sometimes the database comes over cleanly but a chunk of the uploads folder does not. Everything looks fine on the pages you check, and the missing files hide in the pages you don’t.

    You linked to an image on another site. Maybe years ago, maybe in a post you forgot about. That other site reorganized, or shut down, and now your page points at nothing. No cleanup on your side caused it, and no backup of yours can restore it.

    You renamed a file. New file name, but one old post — or a widget, or a theme setting — still uses the old URL.

    A CDN or optimization plugin hiccuped. Sometimes the file exists but a service in front of it fails for some visitors. These are the worst kind, because the image works when you look.

    Notice something about that list: most of these are silent. Nothing emails you. No error log fills up. The page just quietly gets worse, and the only people who know are the visitors who see it.

    What a fallback image is (and what it is not)

    A fallback image is a stand-in. It is one image you choose — usually your logo on a soft background, or a simple branded placeholder — that appears wherever a real image should be but isn’t. It shows up in two situations: a broken image (an image tries to load and fails, and the visitor sees your fallback instead of the torn-photo icon) and a missing featured image (a post never got one, and it uses your fallback as its thumbnail instead of showing a blank card).

    Here is what a fallback is not: it is not a repair. If a post points at a deleted file, that reference is still wrong; the fallback just covers for it so visitors don’t suffer while it’s wrong. That is why ImageCraft pairs the fallback with a scan that tells you which images are actually broken. The fallback protects your visitors today. The scan list is your to-do list for fixing things properly.

    ImageCraft never touches your content. It does not edit your posts, and it does not save the fallback into your database. Everything happens at the moment the page is shown to a visitor. Turn the feature off and every page renders exactly as it did before — there is nothing to undo, because nothing was done to your data.

    Setup: pick one image, flip one switch

    You do this once.

    1. Install ImageCraft from the WordPress plugin directory and activate it, if you haven’t already.
    2. Go to ImageCraft → Settings → Image Fallbacks.
    3. Turn on Enable image fallbacks. This is the master switch for everything below it.
    4. Under Broken images, turn on Replace broken images on the front end and choose a Fallback image from your Media Library.
    5. Under Missing featured images, turn on Use a default featured image. You can pick a second image here, or just tick Use the same image as the broken-image fallback and reuse the first one.
    6. Click save.

    That’s it. No code, no theme edits, and you don’t need an AI key for any of this — Image Fallbacks works even if you use ImageCraft only for this one job.

    Tip: Before you pick your fallback image, give it good alt text in the Media Library. When ImageCraft swaps a broken image that had no alt text of its own, it uses the fallback’s alt text in its place. A blind visitor hears something useful instead of nothing.

    Part 1: Replace broken images for visitors

    Once this is on, ImageCraft adds one small script to your public pages. It watches every image on the page. The moment an image fails to load, the script swaps it for your fallback image. It also checks for images that had already failed before the script started, so nothing slips through on slow connections.

    The visitor experience is simple: they never see the gray torn-photo icon. They see your fallback image, sitting cleanly where the broken image would have been. The page keeps its shape, the layout doesn’t jump, and the site looks cared for.

    • It catches everything, including images you don’t control. Because the swap happens in the visitor’s browser, it works on hotlinked images from other sites, CDN failures, and files missing from your own server alike.
    • It fills in alt text. If the broken image had alt text, it keeps it. If it had none, the fallback’s own alt text is used. Screen readers and search engines still get a real description.
    • It can’t loop. Every swapped image is marked, so if your fallback image itself ever failed to load, the script stops rather than trying forever.

    What it does not do: it does not change the page’s saved content. The post still contains the original image URL. If you fix the real image later, the real image simply loads again and the fallback steps aside. Nothing to clean up.

    Part 2: Give every post a featured image

    Featured images do more work than most people realize. Your theme uses them in the blog archive, in “related posts,” in sliders and grids. Social networks use them when someone shares your link — that preview card on Facebook or LinkedIn is your featured image. A post without one shows up as a gap in all of those places.

    Turn on Use a default featured image, and any post without a featured image quietly uses your fallback instead. Everywhere. The archive card gets a thumbnail. The related-posts box fills in. The social share preview shows your image instead of a gray nothing.

    The important word is quietly:

    • Your post is never modified. ImageCraft does not attach the image to the post or write anything to the database. Open the post in the editor and the featured-image box is still empty — which is honest, because it is.
    • Real featured images always win. The fallback only appears when there is nothing else. Set a real featured image and that image is used, everywhere, immediately.
    • wp-admin is untouched. Your post list and editor show the true state of things, so you can still see which posts genuinely lack a featured image. The fallback is for your visitors, not for you.

    By default this applies to every public post type. If you want it narrower — say, posts but not pages — use the Apply to post types checkboxes on the same settings screen.

    Note for stores and Pro users: with ImageCraft Pro you can set a different fallback per post type — for example, a product-shaped placeholder for WooCommerce products and your logo card for blog posts. The free version uses one global image everywhere, which covers most sites fine.

    Part 3: Find your broken images and actually fix them

    The two features above protect your visitors. This one is for you.

    Open the ImageCraft Dashboard. It scans your Media Library in the background, checking every image against the files actually on your server. Any image whose file is missing shows up in the Needs attention area as a broken-images count, with a link to the fallback settings.

    ImageCraft Dashboard with the Needs Attention widget showing a broken images count and a Fix link

    This matters because a fallback, on its own, has a downside: it hides the evidence. If broken images always look fine to visitors, they also always look fine to you, and you might never fix the underlying references. The scan closes that gap. You get the clean visitor experience and a plain list of what is really broken.

    • It runs on your server, not in your browser. It checks whether each image’s file exists on disk. That catches deleted and lost files — the most common case. It can’t check images hosted on other people’s sites, but the front-end swap covers those for visitors anyway.
    • It is patient with big libraries. On a site with tens of thousands of images, the scan works in chunks and picks up where it left off, so it finishes without straining your server.
    • The scan runs even if fallbacks are off. You can use ImageCraft just to find broken images, without enabling any front-end behavior at all.

    What do you do with the list? For each broken image, you have three honest options: restore the file from a backup, edit the post to use a different image, or remove the image from the post entirely. The fallback buys you time to do this calmly instead of in a panic.

    Pro: ImageCraft Pro can run this scan on a schedule — daily or weekly — and email you only when new broken images appear. Break something on Tuesday, know about it Wednesday morning, instead of finding out from a visitor months later.

    Will this slow down my site?

    Short answer: no. The broken-image script is a tiny, dependency-free piece of JavaScript that loads after your page content. It does not delay anything the visitor sees, and it sits idle unless an image actually fails. The featured-image fallback is a lightweight check built to answer “nothing to do here” as fast as possible, which is what it says on every image that is fine.

    And when the whole feature is switched off — which is the default — none of this loads at all.

    Choosing a good fallback image

    The fallback image will appear in places you can’t predict — a wide hero slot on one page, a small square thumbnail on another. A few guidelines make one image work everywhere:

    • Keep it simple. Your logo centered on a soft, solid background is the classic for a reason. It looks intentional at any size.
    • Avoid text beyond a word or two. Text becomes unreadable when the image is shown small, and awkward when it is cropped.
    • Match your brand colors. The fallback will sit next to your real content. It should look like it belongs.
    • Use a reasonably large source image. Something around 1200×630 works well — that is also the size social networks like for share previews.
    • Give it alt text. The fallback’s alt text is what screen readers hear when a broken image had none. Something plain like “Sunrise Coffee Co. logo” is perfect.

    Don’t overthink it. The fallback’s whole job is to be quietly acceptable. If a visitor doesn’t consciously notice it, it is working.

    Frequently asked questions

    Does this change my posts or my database?

    No. This is the feature’s core promise. Nothing is written to your content. The broken-image swap happens in the visitor’s browser, and the featured fallback is applied at display time. Turn the feature off and your site is back to exactly how it was.

    Will the fallback show up in my wp-admin?

    No. The editor, the post list, and the media modal all show the true state of your content. A post without a featured image still looks empty in admin, so you always know what’s real.

    What happens when I fix the real image?

    The fallback steps aside on its own. It only ever appears when the real image is broken or missing. Restore the file, or set a real featured image, and the real one shows immediately. Nothing to undo.

    Does it work with my theme? Block themes too?

    Yes. The featured fallback answers the same question every theme asks — “does this post have a thumbnail?” — so classic themes, block themes, and page builders all pick it up naturally. It reaches social share previews the same way.

    Does it catch images hosted on other sites?

    The front-end swap does, yes — it covers anything that fails to load in the browser, wherever it lives. The Dashboard scan only checks files on your own server, since it can’t inspect other people’s sites.

    Do I need an AI key for this feature?

    No. Image Fallbacks is completely independent of the AI features. You can use ImageCraft only for fallbacks, or only for compression, without ever adding a key.

    Is this in the free version?

    Yes — the master toggle, the broken-image swap, the default featured image, the post-type list, and the manual Dashboard scan are all free, with no daily limits. Pro adds two things: a different fallback image per post type, and a scheduled scan (daily or weekly) that emails you when new broken images appear.

    I updated the plugin — did anything change on my site?

    No. Image Fallbacks is off by default. Existing sites behave exactly as before until you turn it on yourself.

    Get started

    Broken images are a small problem with an outsized cost. Each one is silent — no alert, no error, just a gray icon quietly telling your visitors that no one is minding the site. Image Fallbacks fixes the visitor’s experience immediately: pick one image, flip the switch, and no one ever sees a broken icon or a blank thumbnail on your site again. The Dashboard scan then hands you the real repair list, so covering the problem never turns into ignoring it. And because nothing is ever written to your content, you risk exactly nothing by turning it on.

    Open ImageCraft → Settings → Image Fallbacks, turn on Enable image fallbacks, choose a fallback image, enable both features, and save. Five minutes, once — and one whole category of embarrassment is gone for good.

    Ready to never show a broken image again? Get ImageCraft →

  • Spectra Image Block: How to Add AI Alt Text, SEO File Names

    Spectra Image Block: How to Add AI Alt Text, SEO File Names

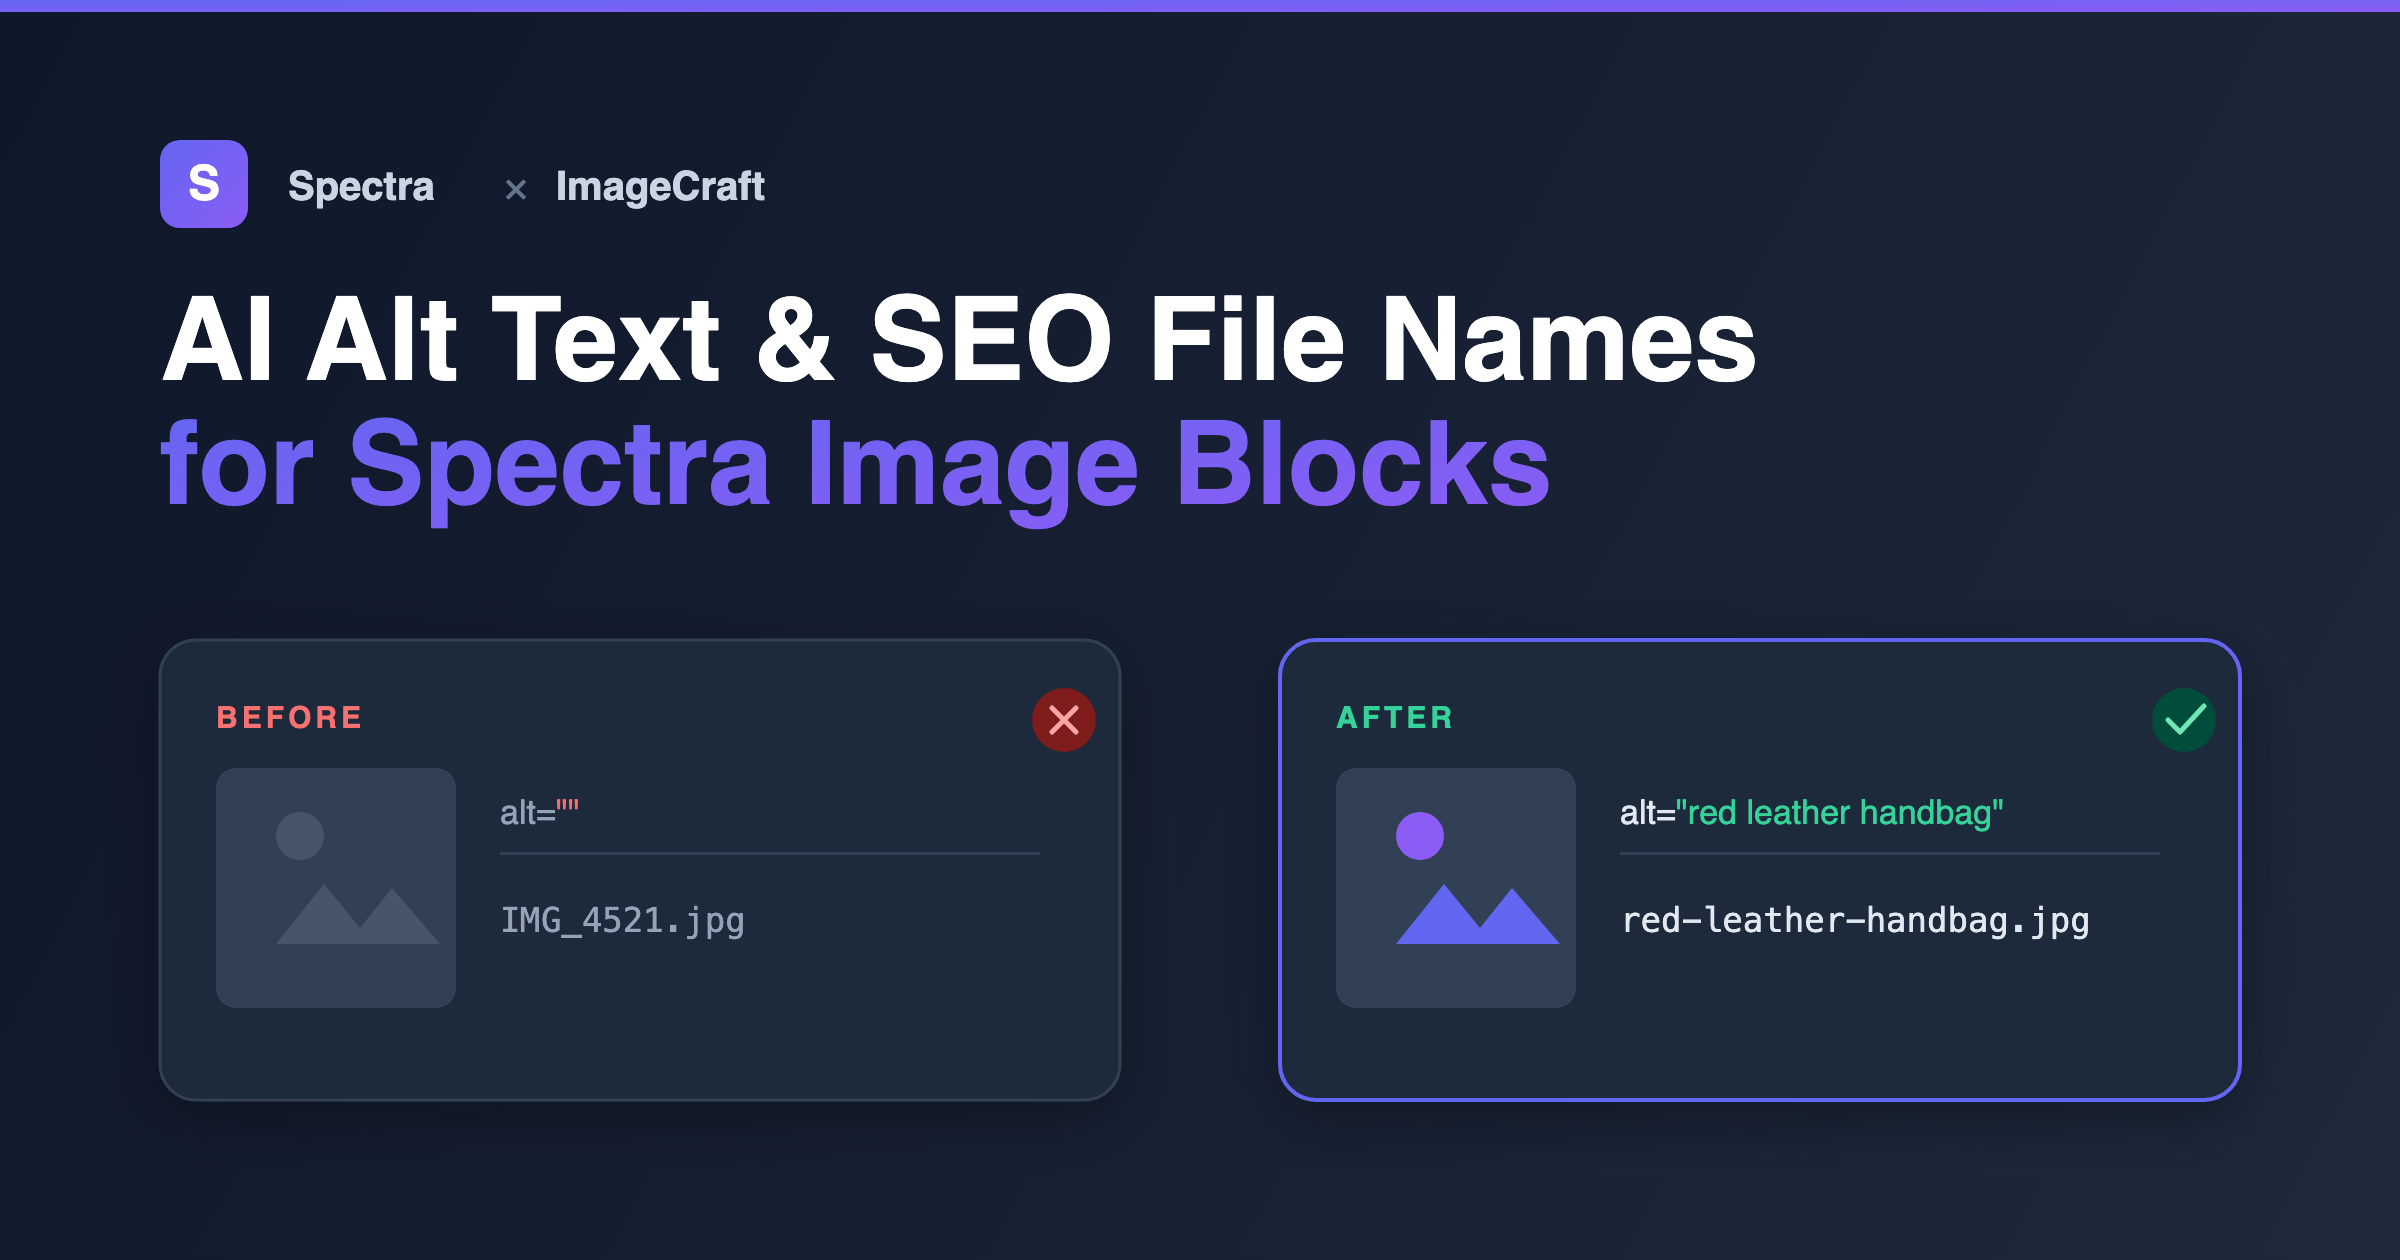
    A Spectra layout can look flawless and still quietly hurt your SEO and accessibility. Every Image block you place pulls from your media library — and if those images have empty alt text and file names like IMG_4521.jpg, search engines and screen readers see every flaw the editor hides. ImageCraft fixes that at the source.

    Why Spectra and ImageCraft work so well together

    The Spectra Image block doesn’t store its own copy of an image — it references an attachment in your WordPress media library and pulls that image’s alt text and file URL from there. ImageCraft works at exactly that level. So you don’t optimize images inside Spectra; you optimize them once in the media library, and every Spectra block using that image inherits the result automatically.

    Optimize an image once with ImageCraft, and every Spectra Image block that uses it gets accessible alt text and an SEO-friendly file name — with no block re-editing.

    Method 1: Optimize first, then insert into Spectra (recommended)

    This is the cleanest workflow for any new page or post — get the image right in the media library, then build your Spectra layout on top of polished assets.

    1. Upload your image to the media library.
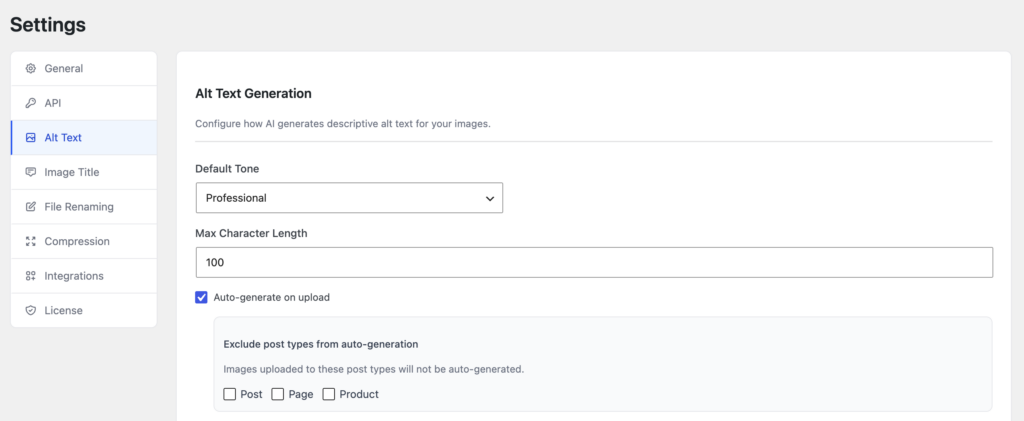
    2. Turn on auto-generate alt text. In ImageCraft → Settings → Alt Text, enable Auto-generate on upload so every new upload gets AI alt text automatically.
    3. Rename the file for SEO. In ImageCraft → Scanner, click Rename to turn DSC_0099.jpg into something like red-leather-handbag.jpg — safely updating the file and its URL.
    4. Add the Spectra Image block and select your optimized image. The alt text and clean file name come along automatically.

    Prefer a particular wording? In Settings → Alt Text you can pick a tone (Professional, SEO, Casual, Technical) and a max length — and the Spectra block displays whatever alt text ImageCraft saved.

    Method 2: Already built the page? Fix existing images in bulk

    If your Spectra blocks are already live with missing or weak alt text, you don’t need to touch the blocks at all. Because they reference the media library, fixing the image there updates the block automatically.

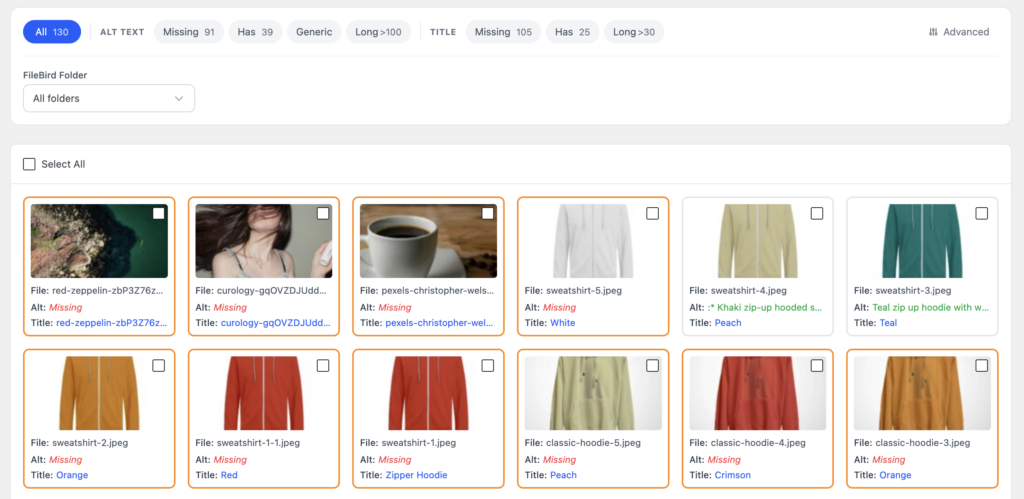
    1. Open ImageCraft → Scanner — it flags every image with missing or generic alt text, including the ones used in your Spectra blocks.
    2. Select the images (or Select All) and click Generate.
    3. Review the AI suggestions and Accept them in bulk.
    4. Reload your page — the Spectra Image blocks now show the new alt text, with no block re-editing.

    For very large libraries, use the Batch screen — it processes hundreds of images in the background, so you can fix an entire site’s worth of Spectra images in one run.

    Frequently asked questions

    Does ImageCraft change the Spectra block itself?

    No. ImageCraft only optimizes the underlying media library attachment — its alt text and file name. The Spectra Image block simply reflects those values when it renders, so there’s nothing to re-edit inside Spectra.

    Will renaming a file break the image in my Spectra block?

    No. ImageCraft updates the attachment’s file and URL references safely, so your Spectra block keeps pointing at the correct new URL.

    Do I need to re-insert images after generating alt text?

    No. Spectra reads alt text live from the attachment, so accepting AI alt text in ImageCraft updates what the block outputs automatically.

    Does this work with Spectra galleries too?

    Yes. Any block that pulls from the media library — Spectra’s Image and gallery blocks included — benefits from the optimized attachments.

    Get started

    ImageCraft is free to install and works alongside Spectra, Gutenberg, Kadence, WooCommerce, Yoast SEO, Rank Math, AIOSEO, SEOPress, and FileBird. Optimize your images once in the media library, build your Spectra layout on top, and every Image block ships SEO-ready — without writing a single line of alt text by hand.

    Ready to make every Spectra image count? Get ImageCraft →